
Our PDF Splitter is more than just a cutter—it's a powerful visual editor that gives you control over every page. Instead of struggling with complicated page range commands, you can simply remove the pages you don't want and choose how the remaining pages should be downloaded. Here is a step-by-step breakdown of how to master the splitting screen.
Jump To The Section
Ready to start extracting pages?
Go to the PDF Splitter Tool1. The Split PDF Main Screen and Controls
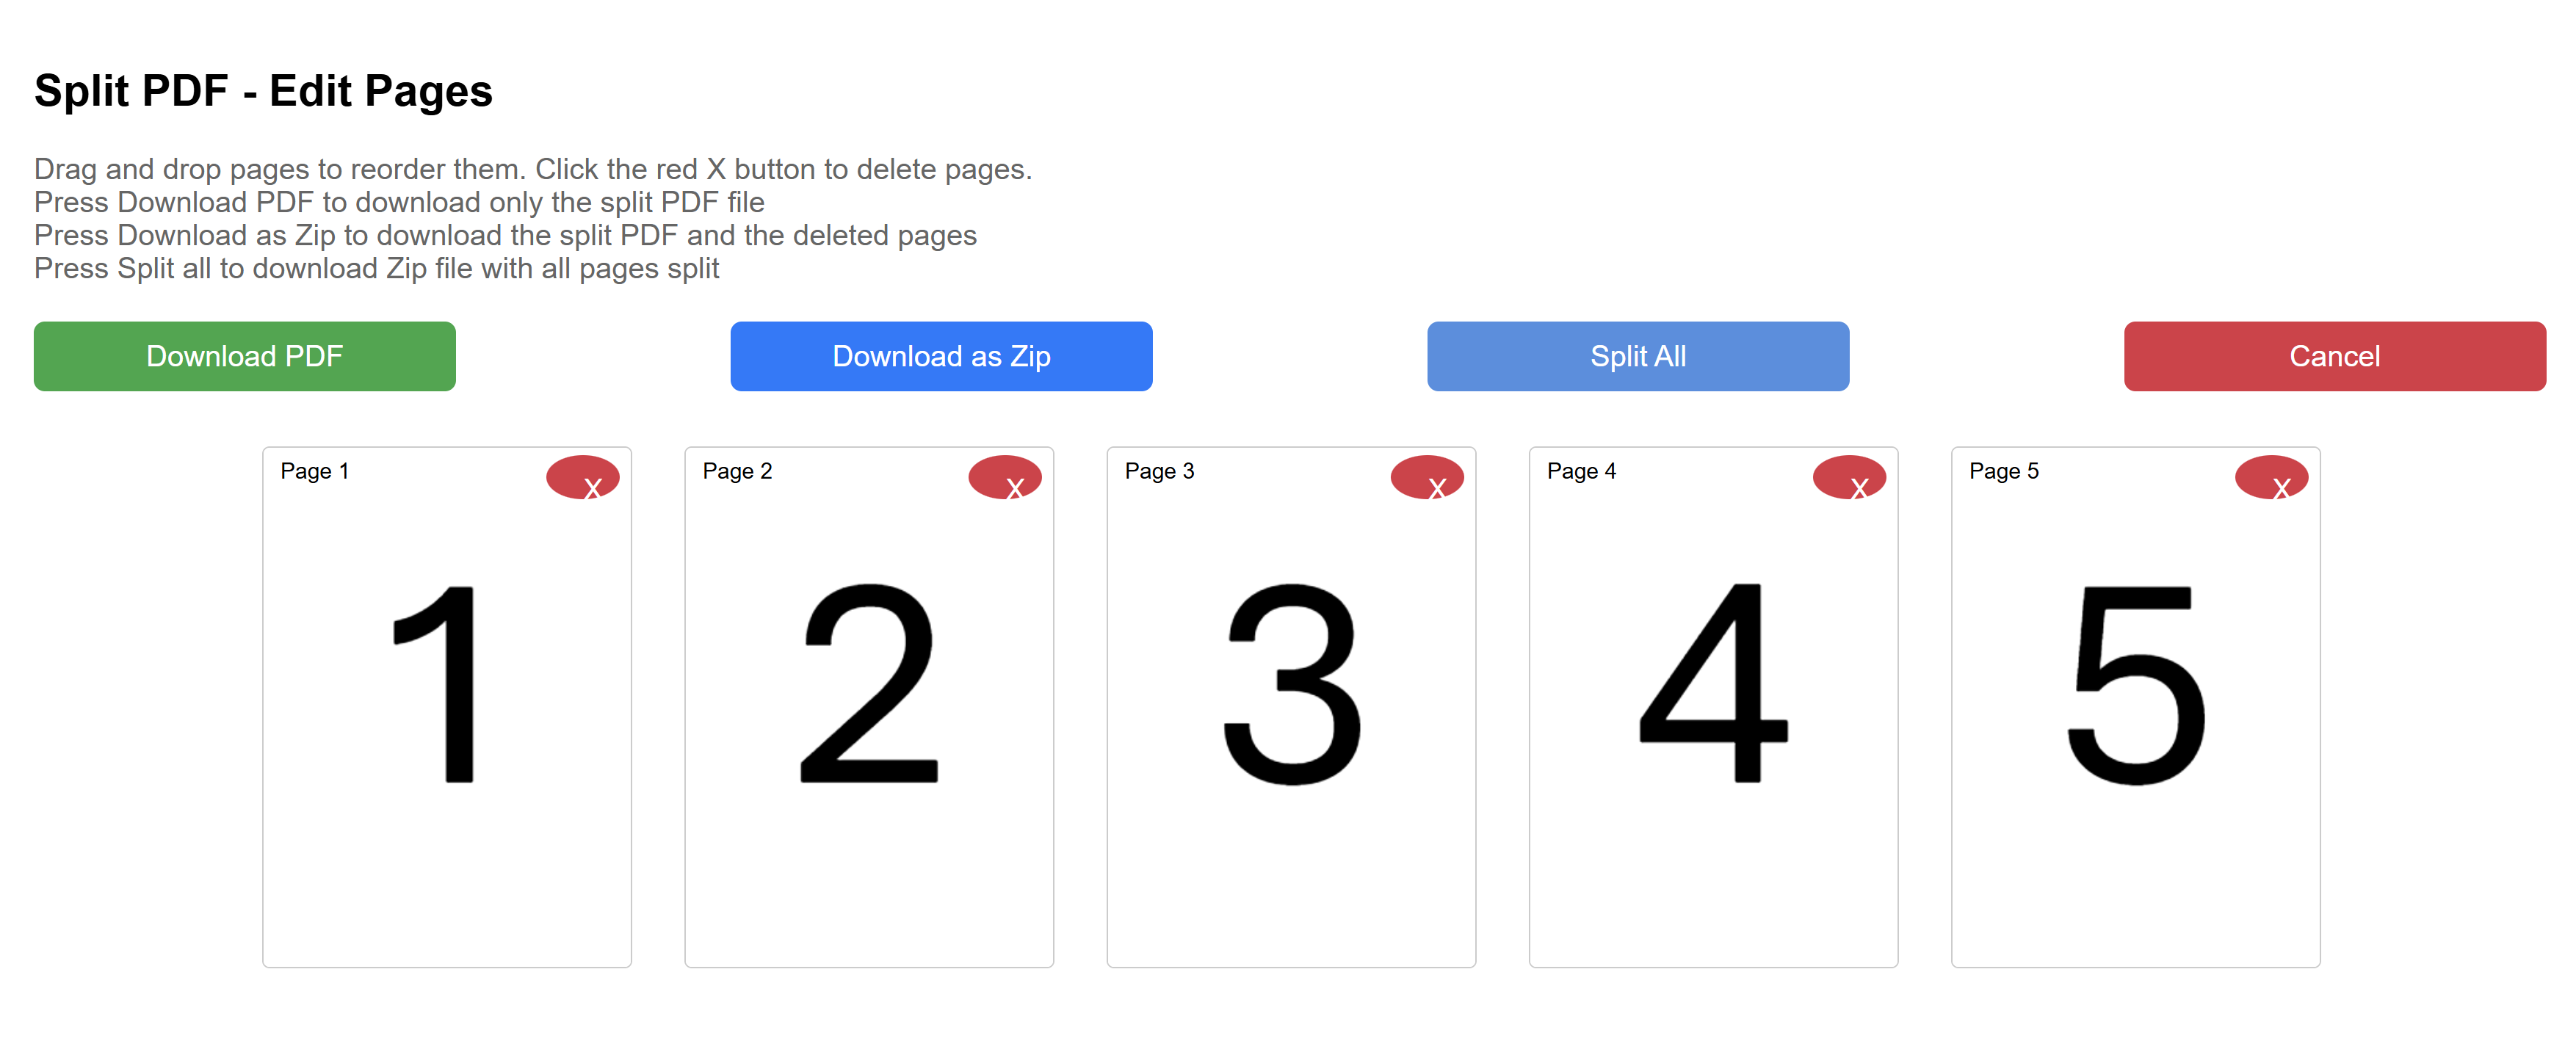
Once you upload your document, and press Split PDF you enter the Split View. Here, every page is displayed as a thumbnail. This view gives you complete control:
- Reordering: You can click and drag any thumbnail to visually rearrange the page order within the document.
- Deleting: Each thumbnail has a small 'X' button in the corner. Pressing 'X' marks that page for removal.
- Action Buttons: At the top, you will find your four main control buttons: Download PDF, Download as ZIP, Split All and Cancel.
The entire process is visual, letting you see the final document before you download it.
2. Option 1: Download a Single Merged PDF
This button is used in Deletion Mode to create a single, new PDF file that only contains the pages you chose to keep.
When you press the Download PDF button, the tool ignores all pages you marked with the 'X' and merges all the remaining, undeleted pages into a single new PDF file. The order of the pages in this new file will follow the visual order you set on the screen.
Example: The Single File Result
If you upload a 5-page PDF (Pages 1, 2, 3, 4, 5) and you remove Page 1 and Page 4, the downloaded file will be a single PDF document containing only Pages 2, 3, and 5.
3. Option 2: Download as ZIP
This option is also used in Deletion Mode, but it gives you access to the pages you removed.
When you press the Download as ZIP button, the resulting ZIP file will contain two distinct types of files:
- One main PDF file: This document contains all the pages you did not delete (the kept pages), merged into a single PDF.
- Individual Page PDFs: A separate PDF file for each page you deleted. These files are named based on their original page number (e.g., "Page 1.pdf," "Page 4.pdf").
Example: The ZIP File Contents
If you upload a 5-page PDF (Pages 1, 2, 3, 4, 5) and you remove Page 1 and Page 4, the downloaded ZIP file will contain three items:
- A main PDF (containing Pages 2, 3, and 5)
- A PDF file named "Page 1.pdf"
- A PDF file named "Page 4.pdf"
4. Option 3: Split All
If you need every single page of your document to become its own separate PDF file, the Split All button is the quickest method. This function bypasses the deletion step entirely and is perfect for documents where every page is an individual deliverable (like invoices or contracts).
Procedure:
When you click Split All, the tool instantly processes the entire document. It provides you with a compressed ZIP file containing individual PDFs for every page of the original document. These files are typically named sequentially (e.g., "Page 1.pdf," "Page 2.pdf," and so on).
Example: Separating a 50-Page Contract
You upload a single, 50-page legal contract and press Split All. The tool generates a ZIP file containing 50 individual PDF files, each representing one page of the original contract.
5. What is the Cancel Button For?
The Cancel button is your escape hatch. Clicking it will discard all current changes (deletions and reorders) and immediately take you back to the file upload screen. This is useful if you realize you uploaded the wrong PDF or want to upload a new document without waiting for the process to complete.
Ready to manage your documents like a professional editor? Use the Pro-PDF Splitter Tool now to take control of every single page.
Need to put documents together instead?
Merge PDFs Here